Make Seed Crackers That Crisp Evenly
A practical step-by-step guide to make seed crackers that crisp evenly, including preparation, instructions, common issues, tips, and next steps.
Make Seed Crackers That Crisp Evenly
Seed crackers are thin, brittle sheets held together by soaked seeds and a small amount of binder, and they crisp evenly only when the dough is rolled to one consistent thickness and dried slowly at a moderate temperature. This guide walks you through mixing, resting, rolling, scoring, baking, and cooling with checks at every stage so the center dries at the same rate as the edges.
Fast Answer
- Roll the dough between two sheets of baking paper to about two millimeters thick, then score it into squares before baking so steam can escape evenly.
- Bake low and slow, then turn off the oven and leave the crackers inside to finish drying so the centers do not stay soft.
Before You Start
- Choose a mix of small seeds such as flax, sesame, chia, and poppy, because small seeds hydrate and bind more evenly than large chunks.
- Soak the seeds in water for at least twenty minutes so they release their natural gel, which holds the crackers together without extra flour.
- Line your baking tray with baking paper and check that the paper lies flat, since wrinkles create thick spots that bake unevenly.
- Measure everything before you start and set the oven to a moderate low heat so the dough does not sit and dry out while you work.
Step-by-Step Instructions
Mix the seeds and soak them well
Combine your seeds in a bowl and add enough water to cover them by about one finger width. Stir once so every seed touches the water, then let the bowl sit for at least twenty minutes. Small seeds such as flax and chia release a gel that coats the mixture and acts as the binder, so this rest is not optional. After soaking, the mixture should look thick, slightly glossy, and scoopable rather than watery. If it is still runny, wait another ten minutes and stir again. This check matters because a wet mix spreads into thin edges that burn, while a fully hydrated mix holds its shape when you roll it. Add salt and any dry seasonings now, and stir until the color and texture look the same throughout.
Rest the dough so the seeds bind
Cover the bowl and let the mixture rest for another ten to fifteen minutes after you season it. During this second rest, the seeds keep absorbing water and the gel network tightens, which makes the dough easier to roll without tearing. You will notice the surface looking less wet and the mixture pulling away from the sides of the bowl when you tilt it. If it still slides like a liquid, stir in one spoon of ground flax or a small handful of extra small seeds and rest it again. This check matters because a dough that is too loose will spread thinner at the edges of the tray, and those thin edges will darken long before the middle is dry. Aim for a texture like thick oatmeal that you can spread with the back of a spoon.
Spread the dough to one even thickness
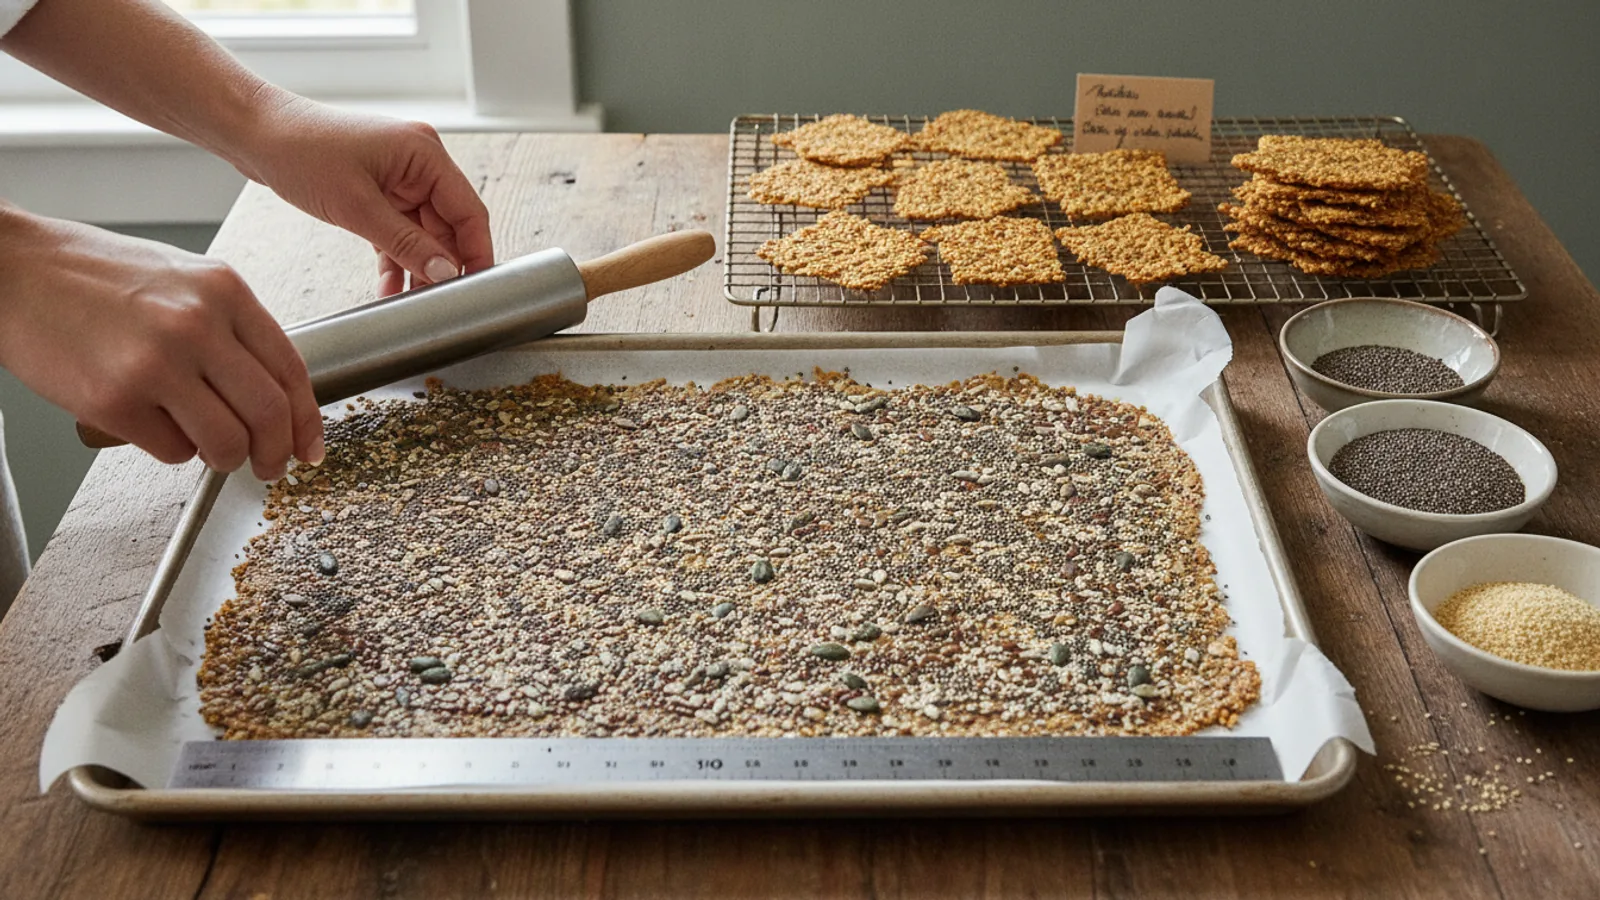
Place the dough between two sheets of baking paper and press it flat with your hands first. Then roll from the center outward with light, even strokes, turning the paper a quarter turn after every few passes so the thickness stays the same in all directions. Aim for about two millimeters, roughly the thickness of two stacked coins. Slide your hand under the paper and feel for thick patches, then roll those areas again. This check matters because uneven thickness is the most common cause of crackers that burn at the corners and stay chewy in the center. When the sheet looks even, peel back the top paper slowly. If the dough sticks, chill it for five minutes and try again. Score the sheet into squares with a knife or a pizza wheel before baking.
Score and separate the squares
Use a sharp knife or a rolling cutter to score the sheet into even squares, pressing down through the dough to the paper without cutting the paper itself. Leave the squares in place on the tray. Scoring gives steam a clear path out of each cracker and creates clean break lines after baking, so you get tidy pieces instead of shattered shards. Space your cuts so each square is roughly the same size, because small pieces finish drying sooner than large ones and will need to come out first. This check matters because a tray with mixed sizes forces you to choose between underbaked large pieces and overbaked small ones. If the knife drags and tears the dough, the dough is too warm; wait a few minutes and score again with a lighter, quicker stroke.
Bake low and slow for even drying
Slide the tray into a preheated moderate low oven and bake until the edges look dry and the surface loses its shine, usually somewhere between forty and sixty minutes depending on thickness and oven behavior. Start checking at the earlier end. Rotate the tray once halfway through so the back and front dry at the same rate. If your oven runs hot on one side, swap the tray position rather than raising the heat. This check matters because a low, steady temperature drives moisture out of the center gradually, while a hot oven hardens the surface and traps steam inside. When the crackers look pale gold and feel firm at the edges, they are close. Turn the oven off and leave the tray inside with the door closed for another twenty to thirty minutes to finish the centers.
Cool completely before storing
Move the tray to a wire rack and let the crackers cool in place until they reach room temperature. They will crisp further as they cool, so do not judge the texture while they are still warm. Once cool, break along the scored lines and snap one open to inspect the inside: it should look dry and uniform, with no darker, soft middle. If any piece bends instead of snapping, return the whole batch to a low oven for another fifteen minutes, then cool again. This check matters because crackers packed while warm release steam into the container and turn soft within hours. Store fully cooled crackers in an airtight container away from heat and light, and check them the next day before deciding the recipe is finished.
Quick Reference
| Situation | Action | Why it helps |
|---|---|---|
| The edges of the tray are browning while the middle still looks pale and soft. | Remove the browned outer pieces with a thin spatula, lower the oven heat slightly, and return the tray so the middle can finish drying without the edges burning further. | Edge pieces are thinner and lose moisture first, so pulling them out stops the burning while the thicker center continues to dry at a gentler heat. |
| The rolled dough tears or sticks as you try to peel back the top sheet of baking paper. | Lay the paper back down, chill the tray for five to ten minutes, then peel the paper slowly from one corner while holding the dough steady with your other hand. | Chilling firms the gel binder so it grips the dough instead of the paper, which lets the sheet release without stretching or ripping. |
| The finished crackers taste fine but bend instead of snapping after they cool. | Spread them on a tray and return them to a low oven for fifteen to twenty minutes, then cool them fully on a rack before testing again. | A bend means moisture is still trapped in the center, and a second low drying pass removes it without scorching the outside. |
Common Issues
- The crackers are chewy in the middle even after the full baking time.: Return them to a low oven in a single layer and dry them for another fifteen to twenty minutes, then cool completely before testing. Next time, roll the dough thinner and score smaller squares so steam escapes from more places, and leave the tray in the turned-off oven longer at the end.
- The sheet cracks and separates while you roll or move it.: Stop rolling, press the cracks together with damp fingers, and let the dough rest for ten minutes so the gel can rebond. Roll with lighter pressure and turn the paper often. If the dough is cold and stiff, let it sit at room temperature briefly before continuing.
- Some squares burn while others stay pale on the same tray.: Sort the pieces by size and thickness before baking, and use two trays if needed so each group gets the time it requires. Rotate the tray halfway through and move outer pieces toward the center. Check the thinnest squares first and remove them as soon as they look dry.
Advanced Tips
- Grind a small portion of your seeds into a coarse meal and leave the rest whole; the meal fills gaps between whole seeds, which creates a denser sheet that dries more evenly.
- Toast part of the seeds in a dry pan before soaking to build a deeper flavor, but cool them completely first so they do not warm the dough and make it sticky.
- Slide a second sheet of baking paper under the dough before scoring so you can lift the whole sheet onto a cool tray if one area browns faster than the rest.
Final Checklist
- The dough was soaked and rested until it held a soft mound and no water pooled around it.
- The sheet was rolled to one even thickness of about two millimeters and scored into same size squares.
- The tray baked at a moderate low heat with a halfway rotation, then dried in the turned-off oven.
- Every cracker cooled fully on a rack, snapped cleanly, and was stored in an airtight container.
FAQ
Why do my seed crackers stay soft in the center?
The center still holds moisture because the heat set the surface before the middle dried. Roll the dough thinner, score smaller squares so more steam can escape, bake at a lower heat for longer, and leave the tray in the turned-off oven to finish drying. Always cool completely before judging the texture, since crackers crisp as they cool.
Can I prepare the dough ahead of time?
Yes, you can soak and season the mixture, cover it, and keep it cool for up to a day before spreading. Let it sit at room temperature for about fifteen minutes and stir it well before rolling, because chilled dough is stiffer and tends to crack. If it looks watery after resting, stir in a spoon of ground flax to tighten it.
How should I store finished crackers?
Cool them completely on a rack first, then pack them in an airtight container and keep it away from heat and light. If they soften later, spread them on a tray and dry them in a low oven again. Check your local food safety guidance for how long homemade dried crackers keep in your conditions.