Choose A Mini Chopper For Herbs And Nuts
A practical step-by-step guide to choose a mini chopper for herbs and nuts, including preparation, instructions, common issues, tips, and next steps.
Choose A Mini Chopper For Herbs And Nuts
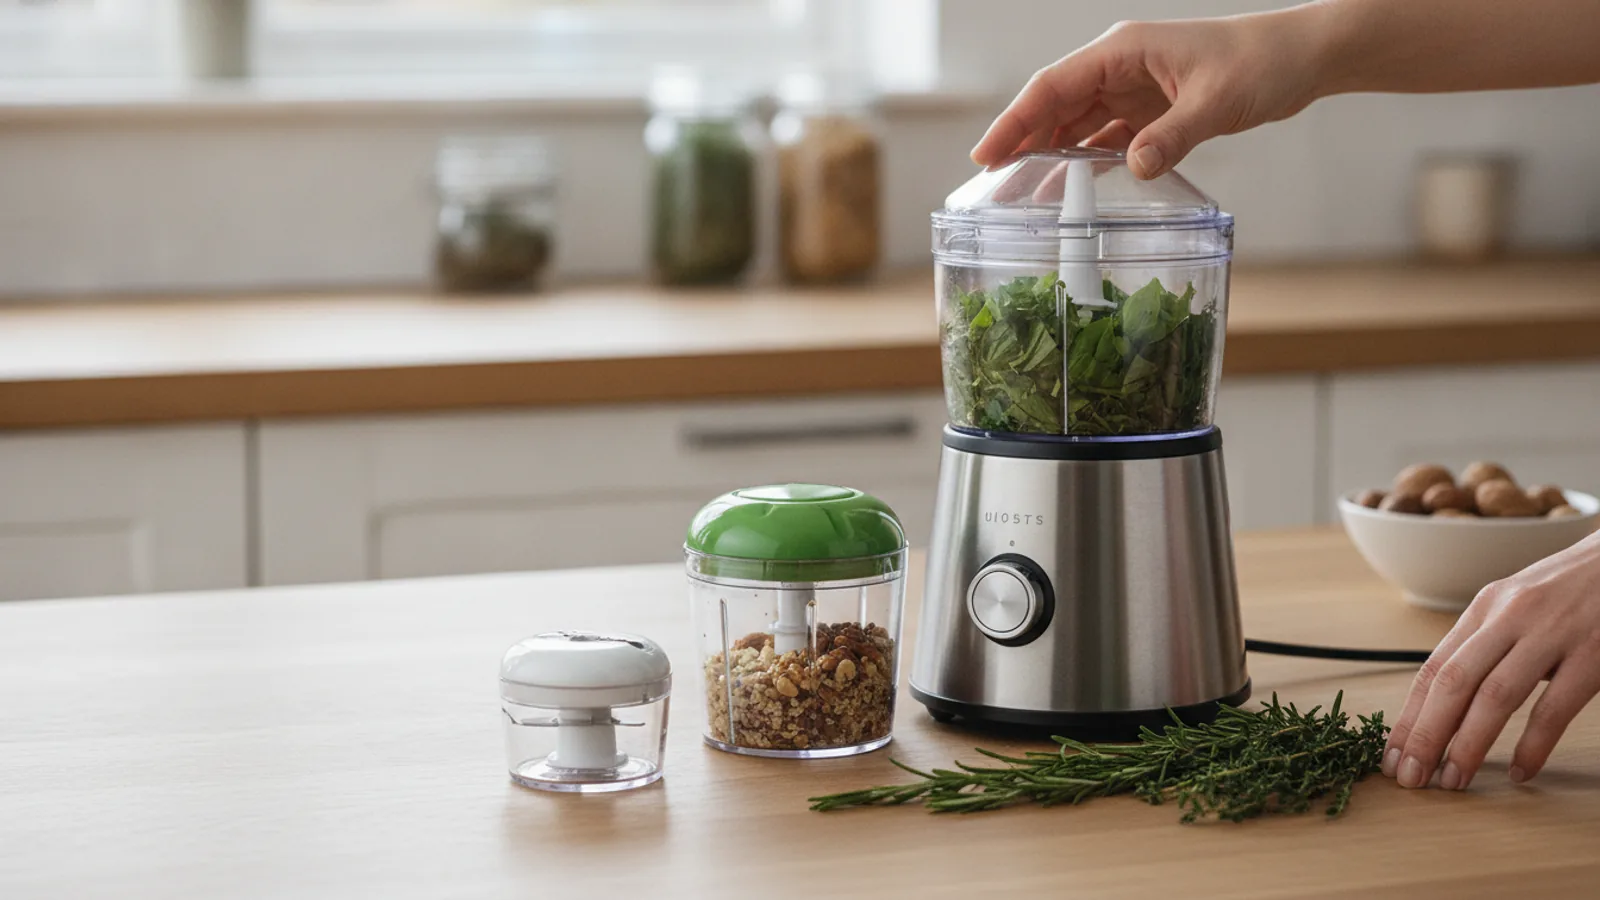
A mini chopper is a small countertop appliance that spins one or two curved blades to chop herbs and nuts in short pulses. This guide helps you pick a model that fits your counter, your usual batch size, and the textures you cook with most, so you avoid buying a unit that bruises delicate herbs or stalls on hard nuts.
Fast Answer
- Choose a model with a removable blade assembly and a bowl you can rinse without touching the sharp edge.
- Match bowl size to your normal batch: small for garnish herbs, larger for pesto or nut butters.
Before You Start
- Measure your cabinet clearance and counter footprint, then write down the maximum height and width you can store or leave out.
- List the three foods you chop most often and note whether each is soft, leafy, hard, or oily.
- Count how many people you cook for and estimate the largest single batch you would realistically make.
- Check your dishwasher layout and sink depth so you know whether a bowl and lid will actually fit for cleaning.
Step-by-Step Instructions
Set your batch size first
Before comparing any other feature, decide the largest amount you will chop in one go. Fill a measuring cup with the typical quantity: a loose handful of parsley, a cup of basil leaves, or a small pile of almonds. That volume tells you the minimum bowl capacity you need, and it also reveals whether a narrow, tall bowl or a wide, shallow one suits your food better. A tall narrow bowl keeps leaves circulating around the blade, which helps herbs chop evenly, while a wide bowl spreads nuts into a single layer so they do not clump. Check this by imagining your measured amount sitting inside the bowl shape you are considering. Getting capacity right first prevents the common mistake of buying a tiny unit for pesto or an oversized one that never fills enough to chop properly.
Examine the blade design
Look closely at whether the chopper uses one central blade or two stacked blades, and whether the blade sits on a central spindle or rests in the bowl. Two blades at different heights cut both the top and bottom of the load, which reduces how often you stop to scrape down the sides. A removable blade assembly that lifts out by a central stem lets you clean without gripping the cutting edge. Confirm that the blade locks firmly before the motor can start, because a loose blade can wobble and produce uneven pieces. Test this in the store if possible by assembling and disassembling the bowl a few times. A blade that is hard to seat correctly will frustrate you every time you cook, and difficulty seating it often means food can slip underneath.
Check the motor and controls
Mini choppers usually offer either a simple press-and-hold button or a pulse dial. Press-and-hold gives you direct control over pulse length, which matters most for herbs because a long continuous run heats leaves and turns them dark. Look for a motor housing with vents and a rating that matches your hardest food; nuts need more torque than soft leaves. Before buying, read the manual or product page for the recommended maximum continuous run time and the cooling interval. That number tells you how long you can pulse before the unit needs a rest. If you often chop nuts, a motor that must rest after a few seconds will slow your cooking. Confirm the controls are easy to press with one hand while your other hand steadies the bowl.
Evaluate the bowl and lid
Inspect the bowl material, the lid seal, and how the lid locks. A clear bowl lets you watch the chop level without opening it, which keeps food from flying out. A lid with a tight seal and a locking tab prevents leaks when you process oily items such as nut paste. Check whether the bowl has a pour spout or a handle, since both make it easier to empty without spilling. Look at the underside of the lid: a flat design traps fewer bits, while deep ridges and crevices collect paste and are harder to rinse. If the lid has a feed opening, confirm it is wide enough for the foods you plan to add. Confirm the bowl and lid are labeled as washable in the way you prefer, whether by hand or in a dishwasher.
Plan for cleaning and storage
Think through the full cleaning routine before you commit. Count how many separate parts touch food: bowl, lid, blade, and sometimes a spindle or seal. Fewer parts means faster cleanup, but each part must be reachable with a sponge. Check that no narrow channel runs behind the blade hub where paste can hide. For storage, measure the assembled height and the footprint, then compare it with the shelf or drawer where it will live. A cord that is too short for your outlet may force awkward placement near the sink. Decide whether you will store it assembled or take it apart each time; a model that only fits when disassembled may end up buried in a cabinet. Choose a design you can clean and put away in under two minutes.
Test before you commit
Once you have a candidate, run a real test with the foods you cook most. Chop a small batch of fresh herbs first and check whether the pieces are even or whether some leaves remain whole at the top. Then process a small handful of nuts and listen for straining, and feel the motor housing for heat. Add a wet ingredient such as a little oil or a tomato and see whether the blade still moves freely. Confirm that the lid stays locked and that nothing leaks. This sequence reveals whether the bowl size, blade height, and motor strength work together for your cooking. If a store demonstration is not possible, read the manual and return policy so you can test at home and send it back if it fails your herbs or stalls on nuts.
Quick Reference
| Situation | Action | Why it helps |
|---|---|---|
| You mostly chop soft herbs like parsley, cilantro, or mint. | Choose a narrow bowl with a two-level blade and use quick one-second pulses until the leaves are even, scraping the sides once. | Short pulses and stacked blades cut leaves cleanly without heating them, which preserves color and fresh flavor instead of turning herbs dark and bitter. |
| You frequently grind hard nuts such as almonds or hazelnuts. | Pick a unit with a sturdy motor and a blade that seats firmly, then pulse in short bursts and pause whenever the housing feels warm. | Hard foods demand more torque and create heat, so a strong motor plus resting intervals prevents stalling, uneven pieces, and premature wear on the mechanism. |
| You want one appliance for both herbs and nuts in a small kitchen. | Select a mid-size bowl with a removable blade and a locking lid, and process dry nuts before wet or leafy foods to keep cleanup simple. | A removable blade and sealed lid make the switch between textures practical, and ordering dry items first keeps paste and leaf residue from sticking inside the bowl. |
Common Issues
- Herbs turn dark and mushy instead of fluffy.: Pulse for only one second at a time, stop as soon as the leaves look evenly cut, and make sure the bowl is dry before adding leaves. Long continuous running and leftover moisture both heat the herbs and break down their cells, which causes the color and texture to collapse.
- Nuts remain half whole while the rest turns to powder.: Add nuts in a single even layer, pulse briefly, and shake the bowl between pulses so pieces redistribute around the blade. Overloading keeps some nuts above the cutting zone, and shaking brings them back down so every piece meets the blade.
- The unit stops or smells hot during use.: Unplug it, let it cool completely, and process smaller batches with longer pauses between pulses. Motors need airflow and rest; a crowded bowl or back-to-back runs makes the motor strain and triggers a safety cutoff or overheating.
Advanced Tips
- Chill the blade and bowl in the refrigerator for a few minutes before chopping soft herbs to reduce heat buildup and keep color bright.
- For a coarse nut topping, pulse two or three times, then sift out the fine powder and return only the larger pieces for one more pulse.
- Add a teaspoon of dry rice to the bowl and pulse it to scrub residue from tight corners, then discard the rice and wash normally.
Final Checklist
- Measure your cabinet clearance and the largest batch you will chop, then compare both against the bowl dimensions.
- Confirm the blade locks securely and lifts out by a safe central hub you can grip without touching the edge.
- Check that every food-contact part is easy to rinse and that the lid seal does not trap paste in deep grooves.
- Read the manual for maximum run time and cooling intervals, and confirm the return policy before your first real test.
FAQ
Can one mini chopper handle both herbs and nuts?
Yes, but the blade and motor must suit both textures. Herbs need short pulses and a bowl that keeps leaves moving, while nuts need steady torque and a firmly seated blade. A mid-size bowl with a removable two-level blade is the most flexible choice. Test both foods soon after purchase and note which one the unit struggles with.
How full should I fill the bowl?
Stay below the marked maximum line and usually fill only about half to two-thirds for herbs and no more than a single even layer for nuts. Leaving room lets pieces circulate back into the blade path. An overfilled bowl forces the motor to strain and leaves the top portion uncut, so you end up running it longer and heating the food.
What should I check before buying?
Check bowl capacity against your real batch size, blade removal and locking, motor run-time guidance, lid seal, and how many parts need washing. Confirm the footprint fits your storage space and that the cord reaches your outlet. Read the manual and return terms so you can test with your own herbs and nuts and exchange the unit if it stalls.